Welcome to Ricks Shop. I have been out of the airgun hobby for a few years now but I'm leaving this blog up since it still gets a few questions and comments. I hope you find some useful information. Enjoy, Rick
Sunday, April 28, 2013
Benjamin Discovery Update
I had a voice mail on my phone Friday from Crosman. The Disco is dead..... (unintentional pun) Crosman decided to replace my Disco with a new one, very nice! Now the bad news, The Disco is out of stock. They are in the process of building more. It looks like a couple week wait until I get a replacement. :(
Daisy Avanti 747 Triumph Reseal
The 747 has been a great shooter so far. There was an annoying little leak, almost every time I pumped the pistol I could hear a small hiss of air from the valve. It didn't happen every time and sometimes it would stop after a second or two. I thought perhaps there was a piece of dust trapped in the exhaust valve, it looked like this pistol had sat for many years as there was dust and lint on it when I bought it. I could see some dust inside the pump tube ahead of the piston. The small leak wasn't really affecting anything it was more annoying than anything but it needed to be dealt with and it was a good excuse to tear apart another air gun.
Disassembly was easy, I had done some research online to get familiar with the internals before I opened it up.
Three screws hold the side covers on.

Once it is open the internals and grip frame can be separated.

Slide the barrel and valve assembly to the rear. The front sight will stay on the end of the pump tube.

To remove the pump assembly remove the screw and square washer from the pivot.
 Remove the front sight, pivot tube and spacers.


Now to get to the cause of the leak, the exhaust valve.

A 1/2" wrench is needed to remove the valve.

I didn't find any debris or dirt in the valve that would cause the leak. I looked at the valve and seat with a 10X loupe. The valve looked good but the seat looked a little rough. Here is a pic through the loupe. I could see a few small voids that I suspect were causing the leak.

To clean up the seat I used a 1/4" carbide burr. I turned the burr with my fingers and only let the weight of the burr do the cutting. I turned it a few times then checked the seat with the loupe, I repeated this until I had a nice clean seat. Then cleaned the chips out with a Q-tip. I reassembled the valve putting a light coat of oil on the valve and the O-ring that seals the valve to the body.

A few things to pay attention to on reassembly, there are notches in the pivot sleeve that have to be aligned with tabs on the bottom of the front sight.


With the pump reassembled and the front sight attached slide the barrel and pump assembly back in place.


Also make sure the trigger interlock is in front of the shoulder on the bolt. This lever keeps the gun from being fired with the bolt open.

With everything reassembled the head space for the piston needs to be rechecked. With the gun fired and the bolt closed adjust the length of the piston until you can feel the piston touch the face of the exhaust valve with the end of the lever 1 1/8" to 1 1/2" from the closed position.

Everything is reassembled and leak free.

Disassembly was easy, I had done some research online to get familiar with the internals before I opened it up.


To remove the pump assembly remove the screw and square washer from the pivot.


The pump assembly can now be slid out the front of the pump tube.


I didn't find any debris or dirt in the valve that would cause the leak. I looked at the valve and seat with a 10X loupe. The valve looked good but the seat looked a little rough. Here is a pic through the loupe. I could see a few small voids that I suspect were causing the leak.

To clean up the seat I used a 1/4" carbide burr. I turned the burr with my fingers and only let the weight of the burr do the cutting. I turned it a few times then checked the seat with the loupe, I repeated this until I had a nice clean seat. Then cleaned the chips out with a Q-tip. I reassembled the valve putting a light coat of oil on the valve and the O-ring that seals the valve to the body.

A few things to pay attention to on reassembly, there are notches in the pivot sleeve that have to be aligned with tabs on the bottom of the front sight.


With the pump reassembled and the front sight attached slide the barrel and pump assembly back in place.

When installing the grip frame make sure the lever that opens the exhaust valve is in the correct position.

Also make sure the trigger interlock is in front of the shoulder on the bolt. This lever keeps the gun from being fired with the bolt open.

With everything reassembled the head space for the piston needs to be rechecked. With the gun fired and the bolt closed adjust the length of the piston until you can feel the piston touch the face of the exhaust valve with the end of the lever 1 1/8" to 1 1/2" from the closed position.
Everything is reassembled and leak free.

Crosman 100 "Part 2"
My latest find, (the Daisy 747) interrupted this Blog. I had planned on taking more pictures before I reassembled it. That didn't happen. I reassembled it so that I could use it in an online shooting match. I have been shooting bench rest for a few years and finally got to a point where I'm happy with my scores. It is time for me to work on my off hand shooting.


I thought I would put up the pics of the exploded view.


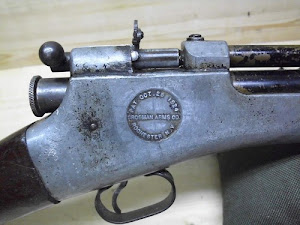
The 100 may seem like an odd choice for practicing my off hand but it is very accurate and I like the way it fits me. Plus it is just plain cool to shoot a 40+ year old air gun.
One of the reasons I like the 100 is the peep sight. I can see the 1/4 inch bullseye at 30 feet, where I can't when using notch and post iron sights

The adjustments are simple and can be a challenge to get zeroed in.

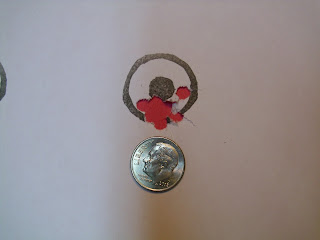
I was able to shoot this group from a rest at ten yards. Plenty good enough to work on my off hand skills (or lack there of) 9 out of 10 can be covered with a dime.
A parting shot of the 100 in shooting condition.

This guy was tempting me to get out the 101 and take him out, but I live in town and don't need the meat. If he gets into the neighbors gardens and makes a pest of himself I could be talked into doing some pest removal.


This guy was tempting me to get out the 101 and take him out, but I live in town and don't need the meat. If he gets into the neighbors gardens and makes a pest of himself I could be talked into doing some pest removal.

Sunday, April 21, 2013
Daisy Avanti 747 "Part 2"
I have wondered this for a while now.... Why does Daisy have the "Avanti" line and not put the Avanti name on the air guns in that line? I have an 853 and now the 747 both say "Daisy Powerline" on the action the Avanti name is no where to be found on either air gun????
I thought I would start off with a few more pics of the pistol.


I thought I would start off with a few more pics of the pistol.


A pic with the lever opened up.

In this pic you can see the adjustable piston. Simply use a flat tip screw driver to turn the piston. Adjust the length until the piston just touches the end of the compression tube at the end of the pump stroke.

T

The trigger adjustment screw is below the trigger guard. I haven't adjusted it, the trigger feels great right out of the box.

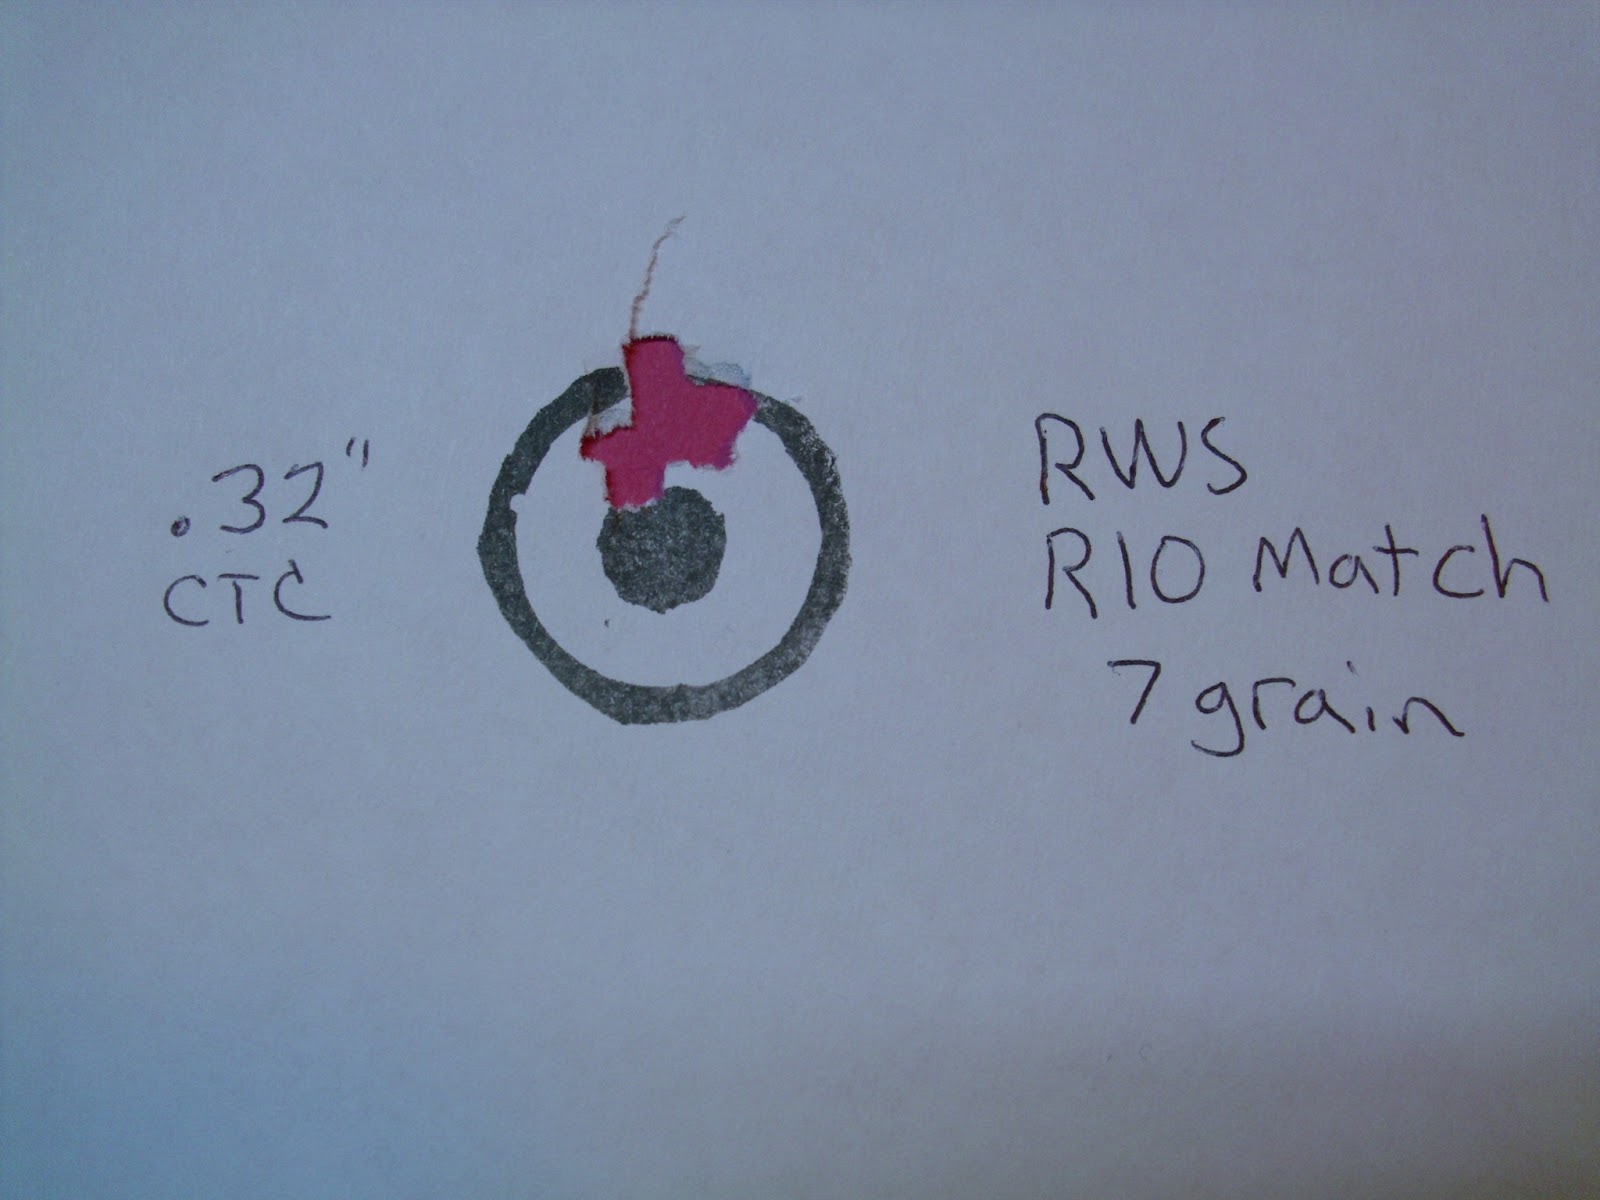
Shooting from a bench with the pistol rested on a bag. The target was set up at 15 feet. The sights were pretty close right out of the box, close enough to check a few pellets. I shot 10 shot groups with the 3 pellets that showed the most promise.
First up is my "go to" pellet for target shooting, RWS R10 in 7 grain.
It did pretty well, .32" center to center.
RWS Meisterkugeln in 8.2 grain were next. They shot as well as the R10 with .32" CTC.
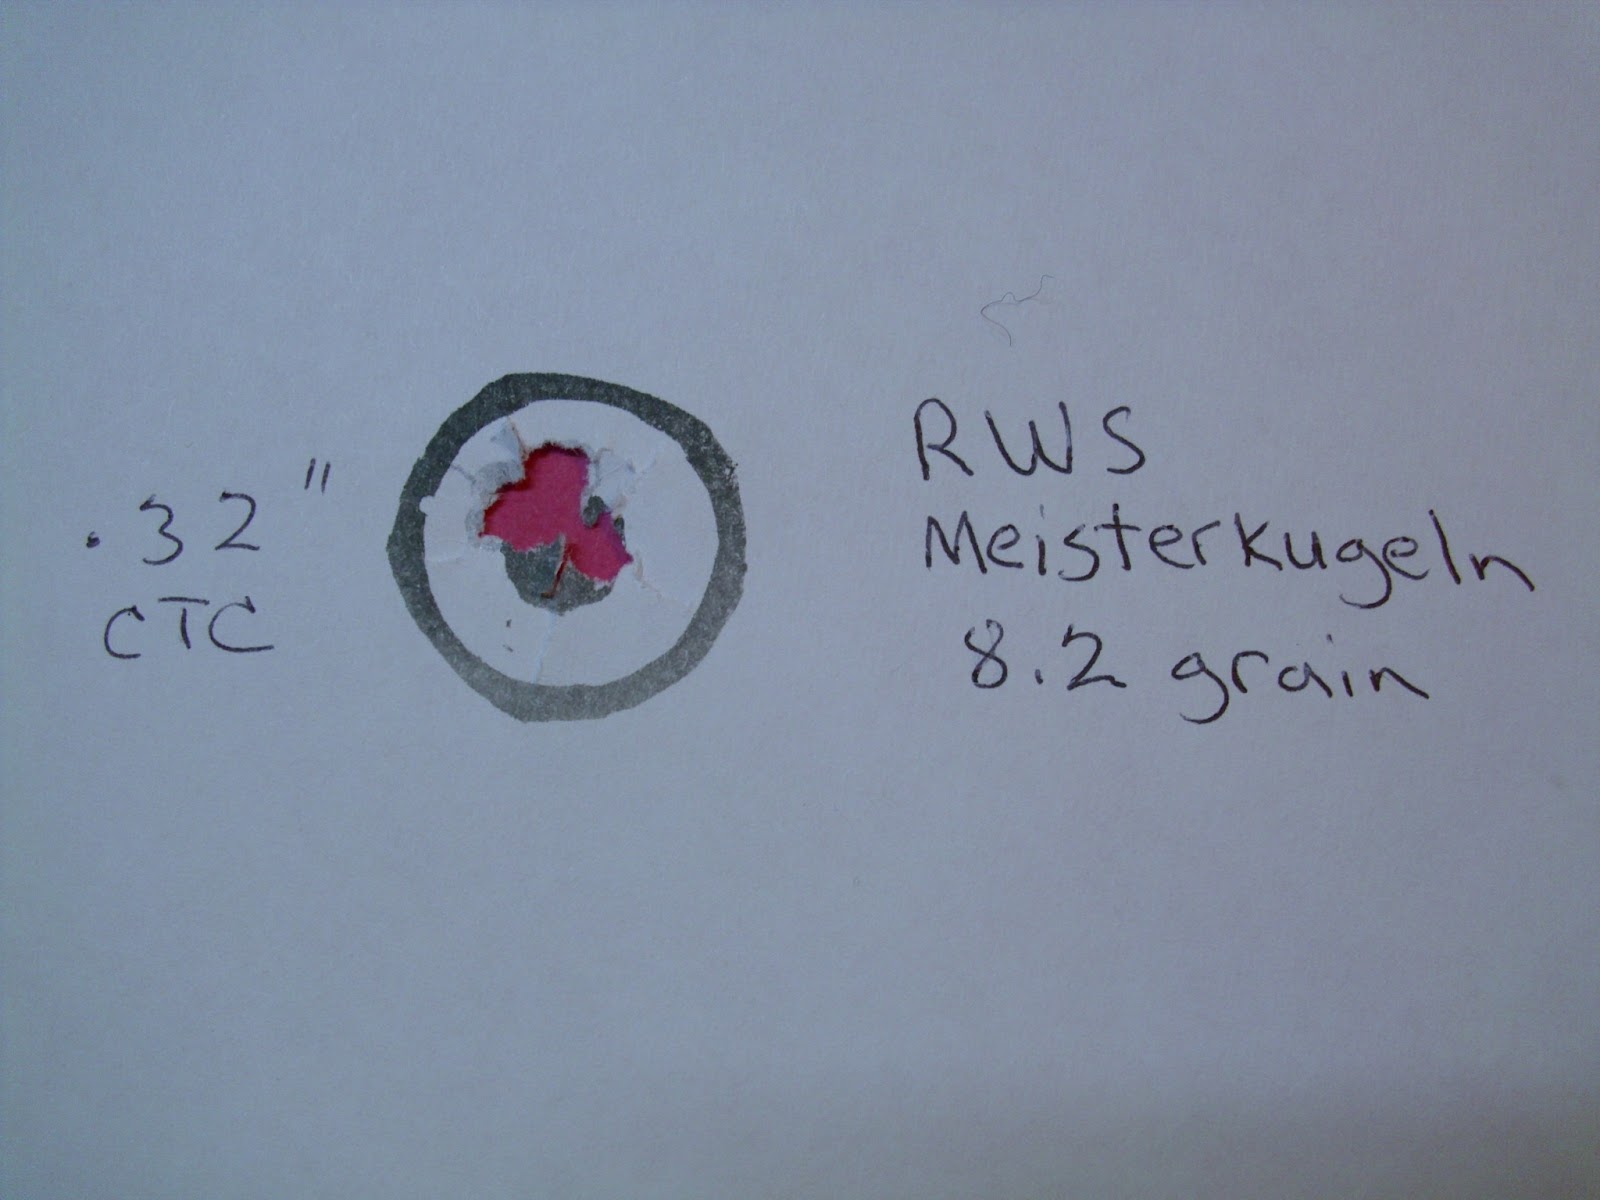
The last pellet I tested was the Vogel. The group opened up to over 1/2".

Saturday, April 20, 2013
Avanti 747
I will have to get back to the Crosman 100 blog later. It has been a long winter here in South Dakota and to break up the monotony I went to the nearest Cabelas. It's 75 miles away. I didn't find anything there I couldn't live without. Leaving the parking lot I saw that the privately owned gun shop I normally visit on this trip had moved across the street from Cabelas. They had just moved and were still setting up the store. I happened to see a Benjamin pumper pistol in a display case and behind it was the Avanti 747, the 747 was priced to sell.
I'm not a pistol shooter by any stretch of the imagination, but I like accurate air guns and I knew this pistol would be very accurate. Needless to say it didn't take long for me to talk myself into bringing it home with me.
I knew that the 747 was a good entry level target pistol but that was the extent of my knowledge. When I got it home and started checking it out I was more and more impressed.
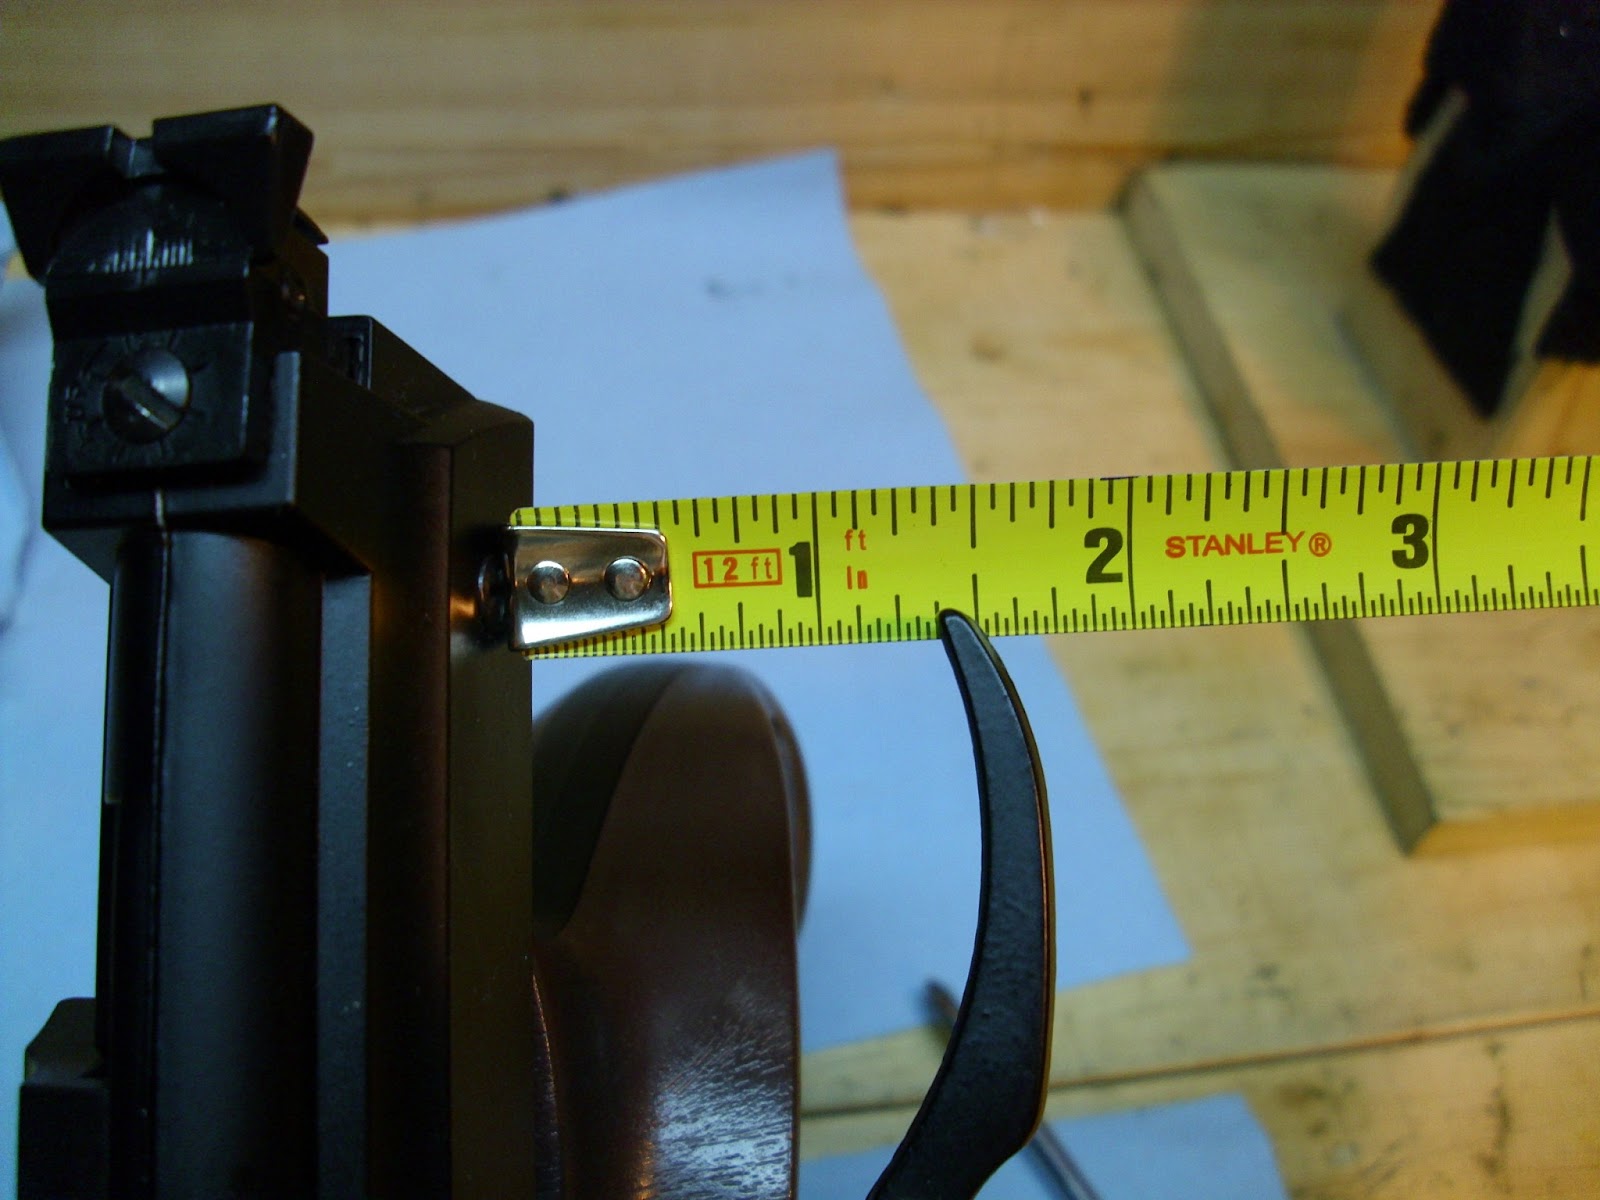
It feels well balanced and has a good weight to it. I gave it a quick once over at the gun shop but didn't see that it has an adjustable trigger, it is adjustable for pull weight from 1 to 3 lbs. Another nice feature is that the pump linkage is adjustable for length.
I'll be spending some time with it this weekend and will do a follow up report.

For those not familiar with the 747. It is a single stroke pneumatic target pistol in .177 cal. Single shot bolt action. It takes 17 lbs of force to pump it. The sights are notch and post the rear sight is adjustable for windage and elevation. There are no provisions for mounting a scope. Trigger pull is adjustable from 1 to 3 lbs. Muzzle velocity is 360 fps.
I'm not a pistol shooter by any stretch of the imagination, but I like accurate air guns and I knew this pistol would be very accurate. Needless to say it didn't take long for me to talk myself into bringing it home with me.
I knew that the 747 was a good entry level target pistol but that was the extent of my knowledge. When I got it home and started checking it out I was more and more impressed.
It feels well balanced and has a good weight to it. I gave it a quick once over at the gun shop but didn't see that it has an adjustable trigger, it is adjustable for pull weight from 1 to 3 lbs. Another nice feature is that the pump linkage is adjustable for length.
I'll be spending some time with it this weekend and will do a follow up report.

Thursday, April 18, 2013
Crosman 100 "Part 1"
I picked up this Crosman 100 a while back on an online auction. I bid on it thinking it was a .22 cal 101 but was pleasantly surprised when it turned out to be the .177 cal version. I all ready have a 101 but the paint is mostly gone. Considering its age the paint on this one is in good shape and the stocks don't look bad either.


It needed some attention, it wouldn't hold air when I got it. The seals in the valve were leaking. The pump seal is worn but still serviceable, I'll probably end up making a new piston that uses O-rings instead of a cup type seal. Replacement seals are still available and finding one is on my list of things to do.

The 100 and 101 are identical other than the barrel and bolt. The internals are pretty simple and maybe a little "crude" but it works. The 101 I have was made around 1929 and after a reseal holds air for months and shoots great.
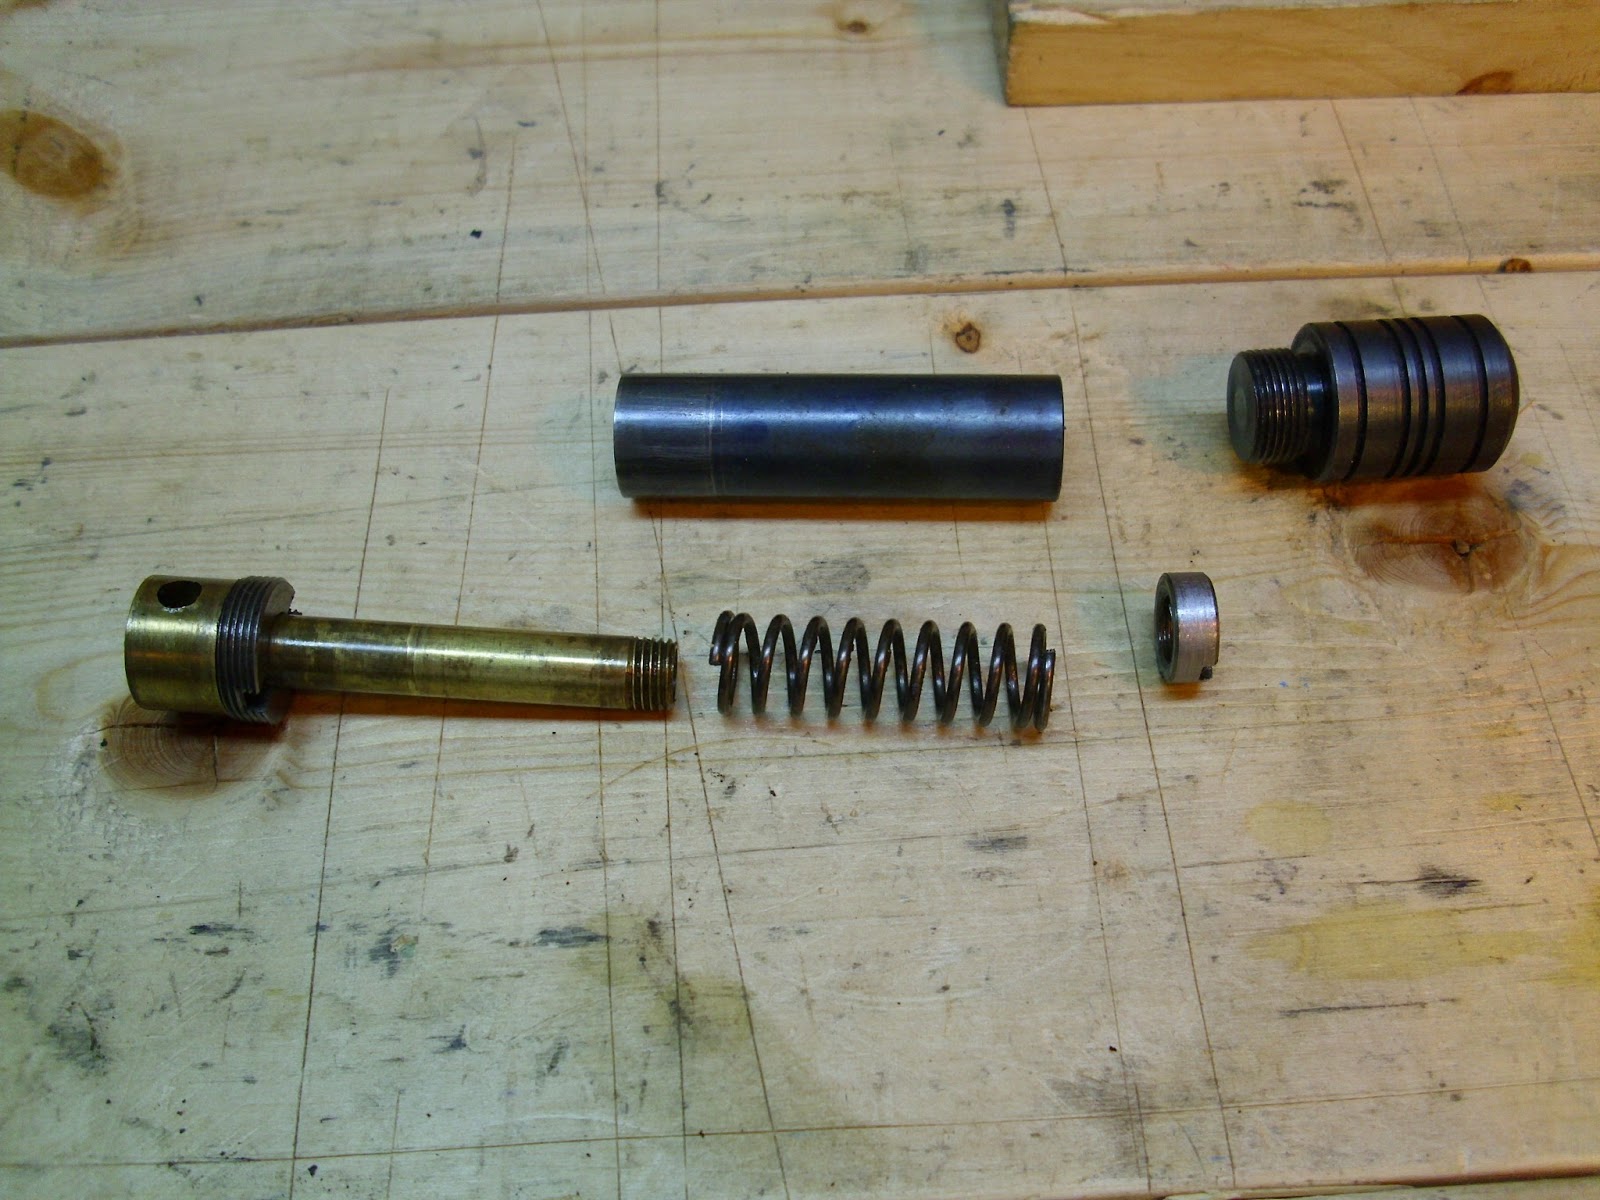
A couple pics of the hammer and valve disassembled....

Monday, April 15, 2013
A trip to the Dark Side
My first venture to the Dark Side of air guns (PCP) is off to a less than stellar start. I've been working 60 hours a week for 2 months now and thought I should reward myself with a .177 cal Benjamin Discovery. It arrived on schedule and looking good but minus the safety button. Not a huge deal, all it took was a call to Crosman to get a replacement safety on its way. Since it is dual fuel I ordered a CO2 bottle and hose so I could do my indoor shooting with the quieter CO2 and use the hand pump for outdoors longer distance shooting, if I ever find somewhere to shoot outdoors. I'm a bit spoiled with my basement shooting range.
My first shooting session was with CO2 and everything went well until I tried to load Crosman Hollow Point pellets. These pellets don't feed well, very rough sliding into the breech and it was difficult to close the bolt. Most of the pellets I tried didn't feed as well as I thought they should. I have had other bolt action air guns that didn't feed well so I continued on to find out how the Disco shoots. Most every review I had read talked about the "tack driver" accuracy of this air gun. I tried six different pellets none of which grouped worth a damn.The accuracy I was expecting just wasn't there.
Not totally discouraged I waited until the following night to try the hand pump and shoot the Disco on HPA. Things were looking up, the groups shrank down considerably. Still not the one hole, pellet on top of pellet groups I had read about but better.
On my third day with the Disco I decided I would get serious and find its favorite pellet. About 15 shots into testing the disco started dumping air out of the barrel. I fired 3 more pellets hoping whatever was holding the valve open would be pushed out. No such luck.
The Disco is on its way back to Crosman with a note describing all the issues I had with it. Now it's time to wait and see, will it come back as the tack driver it should be or will I have to mod the hell out of it to get it where I want it?

Sunday, April 14, 2013
My .22 Cal build, Part 2
The tricky part of the build was the trigger group. Everything has to work together or nothing works.


This group was shot before the stock was done. I mounted the gun in a vice on my bench.

Test shots over the Chrony Show it puts CPHP pellets out at 700fps. Not to shabby.
My .22 cal build
To satisfy my need to build/ create I built my own air gun. Since most of my air gun experience is with Crosman air guns I used their design as a starting point.
 I used the pump linkage from a Crosman 1400

 An aluminum piston with double O rings.
 I used parts from several different valves, no real reason for the choice of parts I just used the parts that gave me the most volume. The next build I do will spend more time figuring out what the volume of the valve should be.
 I made the valve flat topped to match the piston.
 A 3/4" ball end mill made the groove for the pump tube.
.jpg) Chucked up in the 4 jaw to bore the hole for the barrel.
Chucked up in the 4 jaw to bore the hole for the barrel.
 A quick check to make sure the parts fit.
.jpg)


.jpg)

.jpg)
Subscribe to:
Posts (Atom)