Monday, March 2, 2015

Converting a Crosman 766 or 2100 to Bulk fill CO2 and HPA

Related Blogs:
Crosman exhaust valve repair

I have been thinking about this conversion for a while now. I'm not sure what sparked this idea, Tom Gaylords Blog about the $100 dollar PCP or a random question on one of the Airgun forums I frequent. I can't remember, but I'm going to give it a "shot" (pun intended).
My first thought was to use 12 gram CO2 cartridges since they are cheap and easy to get. I quickly gave up on this idea since it would require a tube larger than the 3/4" OD pump tube that comes on the Crosman pumpers and this would make the conversion much more complicated. So how would I keep the same size tube and still run this on CO2? Bulk fill is the answer, and a good one for me since I have the bottles and fill adapter that I use to run my Discovery on CO2. Another bonus is I will be able to try this project on HPA since I plan on using a Discovery fill fitting and I have a hand pump.
This conversion is pretty simple really, just replace the pump tube with a piece of 3/4" DOM tube, and add a fitting to fill the tube with CO2 or HPA.... there are a few other details but that is the basic idea.
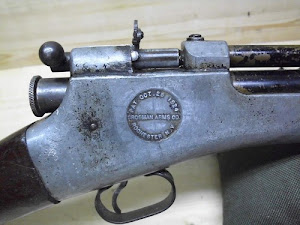
I thought the 766 or 2100 would be a good candidate since the ones I've shot have been accurate shooters also I have rebuilt 4 or 5 of them so I'm pretty familiar with them.
During one of my visits to Gun Broker I came across an auction with a Crosman 140 and a 766 bundled together. Lucky for me the seller had misspelled Crosman so this auction went unnoticed by the other bidders and I got the rifles for a good price.

I like this version of the 766 for the conversion since it is the first version which while it has the soda straw barrel the barrel is encapsulated in plastic instead of like the later models that the barrel floated inside a metal tube.

Another thing I like about this version is that the valve is integrated into the breech, eliminating the transfer port seal. One less place for a leak. 

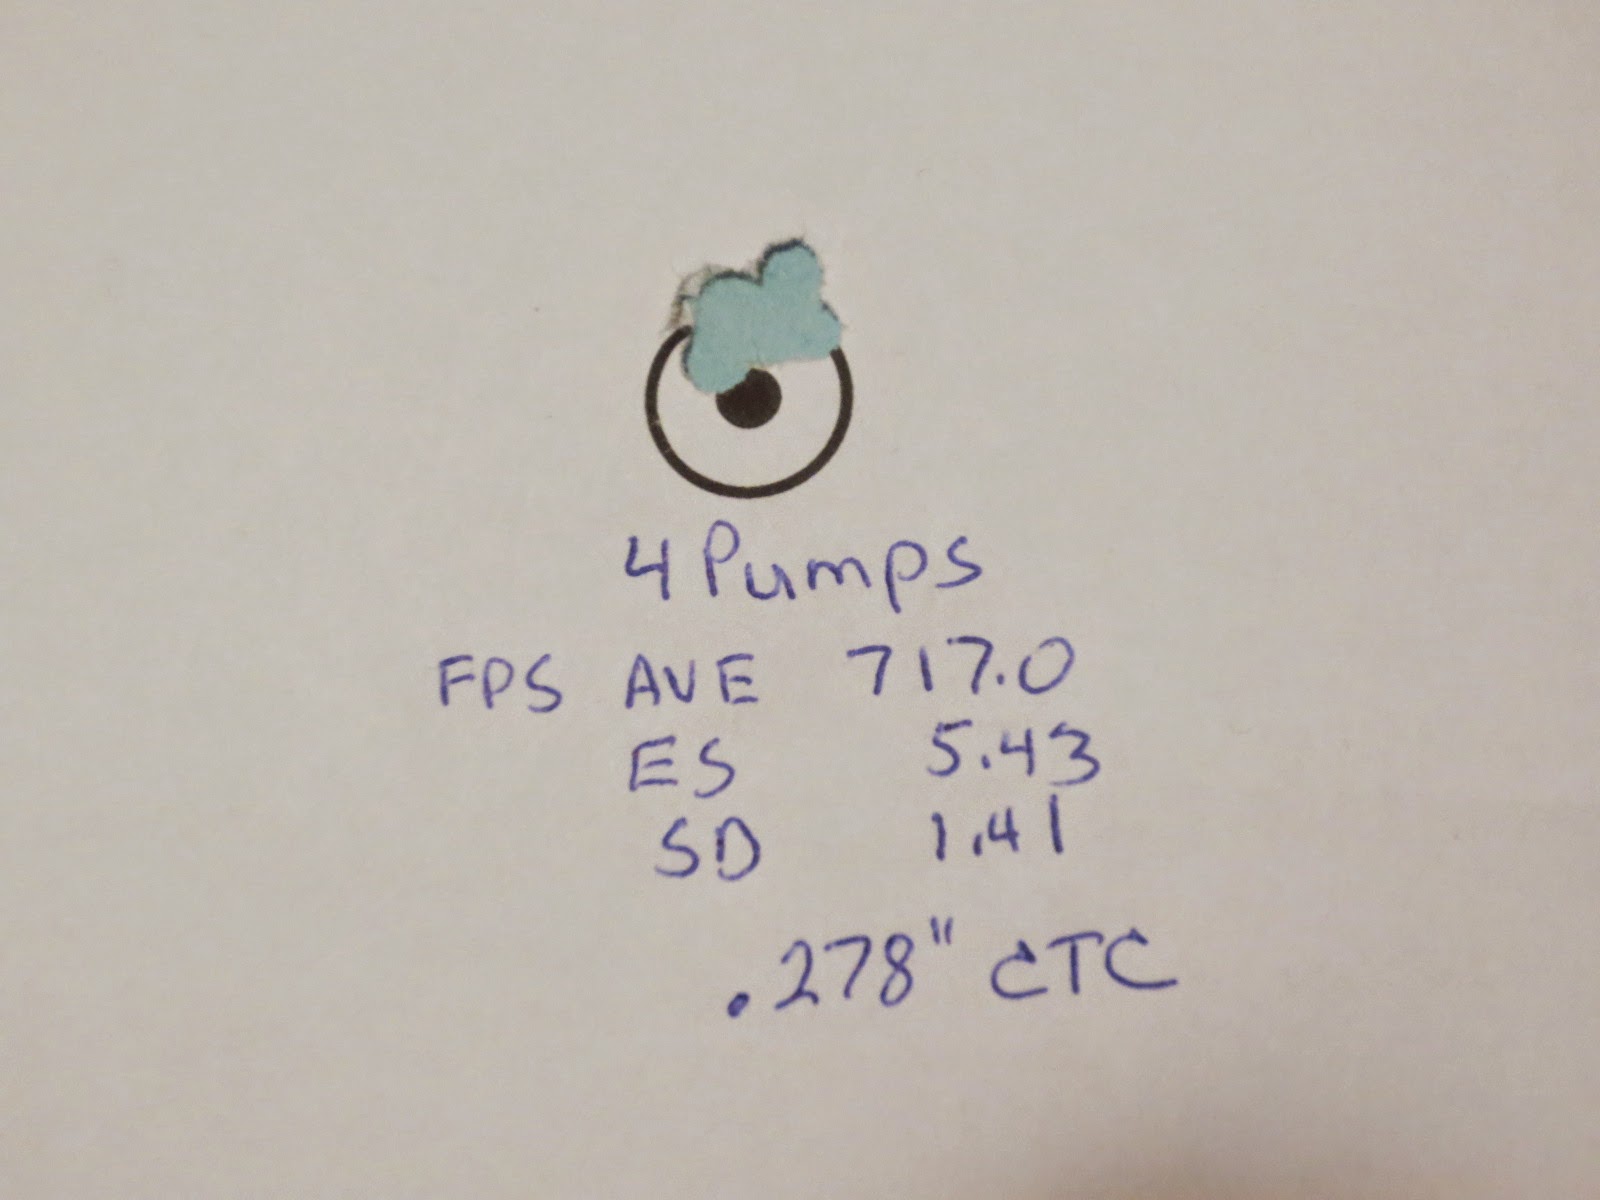
I wanted to get this 766 shooting as a pumper so I would have a baseline to compare to after the switch to CO2. The pump seal was shot along with the exhaust valve. With repairs done I put it back together and put some pellets over the Chrony, the 580 fps at 10 pumps was a little disappointing but only 50 fps below the advertised 630 fps in the owners manual. 
CPHP aren't looking like the best pellet for accuracy, my favorite pellet RWS Meisterkugeln 7 grain didn't do much better 

With the baseline established I'm ready to start the conversion.
 The 3/4" DOM tube I'll be using for the reservoir. 

The slots milled for the valve/ breech and for the sear. 

I ordered a few parts from Crosman, a fill fitting and gauge. I'm not sure if the gauge will go on the 766 for sure, it depends on how it turns out...

The plug for the fill fitting is machined.

I installed the fill plug with socket head cap screws. The heads of the screws would have to shear off for the plug to come out. (Thanks to Big Bore Bart for this idea) 


The valve is held in the tube by the two halves of the receiver, since I plan on trying this on HPA I added two screws to help hold the valve in.  

Assembled and ready for the first shots on CO2. The good thing, it works! The bad, 14 shots dropped the velocity from  570 fps to 500 fps. I'm okay with the velocity but the shot count needs to be higher to make this worth shooting.

 The original 766 hammer spring is meant to dump all the air in the valve with each shot. I replaced that spring with a 2260 hammer spring. That spring is a bit shorter and made from lighter wire. While I had the rifle apart I went ahead and drilled the center out of the check valve since it isn't needed to run this on CO2 or HPA. 

These two changes made all the difference, velocity increased to 610 fps and the shot count increased dramatically. It now takes 40 shots for the velocity to drop down to 500 fps. I assume the increase in velocity came from disabling the check valve. CPHPs seem to like the 610 to 580 fps range. I got a nice round, dime sized group with the first 25 shots. I shot a second target once the fps dropped to 580. I shot 17 more times, I stopped when the velocity had reached 500 fps.   

Happy with the results from CO2 it's on to HPA....
I started out with a 1000 psi fill. 12 shots dropped the velocity from a high of 678 psi to a low of 586 psi. The top target in the picture. 
The lower target in the pic shows the results from a 1500 psi fill, 26 shots starting at a high of  735 fps down to a low of 566 fps.

I put the info from the Chrony into a spread sheet and printed out a graph. I think it is easier to see the performance with this visual representation.
The first 10 shots are pretty flat, slowly falling off after shot 12.

 1800 psi nearly doubles the number of shots above 700 fps. shot #20 falls bellow the 700 fps mark and slowly falls off every shot after that.

Regardless of what the charts show the true test is where the pellets land on the target. I was still seeing fliers with the CPHP pellets so I got out the box of CPFT pellets I had just purchased to see what they would do. In the target bellow I shot 40 shots on a 1500 psi fill. 10 shots at each target. 35 out of 40 shots could be covered with a dime, 4 of the five that landed outside the dime size were the last four shots of the fill.

Since the CPFT pellets seem to work better I thought I'd switch back to CO2. 30 shots into a dime sized group. I shot the lower target with the last 10 shots, while the group is still dime sized it was starting to open up. 

Since I'm calling this project done I thought I should put the front stock on. It took a little work with the Dremmel to get the barrel band to fit and the front stock will be held in place with silicone. Other than the fitting you can't tell it's been converted.

I'm happy with the way this project turned out, 30+ accurate shots at 10 yards on CO2! I prefer the self-regulating properties of CO2 over shooting with HPA. HPA has it's benefits, higher velocities and you can adjust the pressure for the best performance. Since most of my shooting is at 30 feet in my basement I'll power this rifle with CO2.
Thanks for reading!


Sunday, February 15, 2015

Crosman exhaust valve repair

I recently got a new project rifle, a Crosman 766. I bought this rifle to see if I could make it into a bulk fill CO2 rifle. 
That Blog should be next....
Once I got the rifle apart I found this, a crusty exhaust valve with a crumbling seal. I have a couple spare exhaust valves but the stems would need to be shortened and they don't have the brass body. I'm not sure if the brass makes the valve any better but having the extra metal in the valve makes me feel better. 
Here is the exhaust valve as it came out of the 766, It's sitting in the pliers for display purposes. 

I used a couple cheap Chinese pellets to protect the stem while I clamped it in the vice. I should really invest in some soft jaws for my vice. With the valve secured in the vice I used my butane torch to heat up the body. 

The stem is a press fit in the body and the heat expands the body enough that it can be pried off. I tried to be careful but still managed to put a couple dings in the body. The small dings wont really cause a problem since they don't affect the  sealing of the valve.

I cleaned the crud and corrosion from the stem and body. With everything clean I measured for the replacement seal, .310" OD the hole for the stem is .14" and it needs to be .062" thick. 

I had some options for seal material, Delrin, PTFE or HDPE (High Density Polyethylene) I went with HDPE for my first attempt since it is a bit softer than Delrin or PTFE. Turned to the correct diameter and the hole bored I parted off a  new seal.

The seal was a good fit in the body. 

I used my arbor press to re-install the stem in the body. 

The rebuilt valve.... 

I didn't really expect this to work on my first attempt, much to my surprise once the valve was put back together and installed in the 766 it held air. Now I can get on with trying to get the 766 to run on CO2.

Sunday, February 8, 2015

Homebrew .177 build, Part 2

Related blog:
Part 1

The first round on this build went well, I have a working air gun. Now it's time to work on the details and make this thing more comfortable to pump and stable to shoot.
I'll add some weight to the stock and a pump handle will give me a more stable rest along with making it much easier to pump.

I had a mystery stock in my stash of goodies, I had used it as a temporary stock on a previous build.
A trip to the band saw and I have the basic shape of my filler block.

Some work with an orbital sander and the block is a nice snug fit in the 1399 stock.

My pump handle is 2 pieces of Oak separated by a 1/4" thick piece of Poplar.

After adding some shape to it, I think it looks pretty good.

I finally found a use for these Industry Brand pellets.

I filled a cavity in the butt of the stock with the pellets and epoxy. During some testing it was a bit muzzle heavy, this will help balance things out. 

Some dark walnut stain and shellac and the wood is sealed up. 

Painting the pump tube will have to wait for warmer weather, I'll finish this up in the spring. 

I built a new piston to replace the one I robbed from my .22 cal build. 


The plug for the end of the pump tube and a barrel band.

Once I got the rifle reassembled I did some shooting and noticed it wasn't grouping as well as I was expecting. 
I thought I'd try some different pellets to see if one stood out as a good pellet, No joy....  

I tried a few different things to see how they affected accuracy. The 953 liked the RWS Meisterkugeln pellets so I used them for my first tests, 5 shot groups with a floating barrel, the barrel band installed then with the barrel band on I added the barrel weight from a Daisy 853. The best group was with the barrel band and weight installed shooting at 4 pumps. I saw a few encouraging groups but this thing was throwing fliers about every 5th or 6th shot.

Then I remembered a problem I had seen before with the Crosman steel breech. pellets don't always make it past the transfer port, I pulled the barrel and breech to check for this problem.
Sure enough about 1/3 of the transfer port was blocked by the skirt of the pellet. The skirt can collapse when the air from the valve hits it causing problems with accuracy.

My first attempt to solve this problem was to build a bolt with an extended probe. This got the skirt past the transfer port but created another issue. The pellet wobbled on the probe and wasn't going into the breech straight, this caused the pellet to be deformed as it was pushed into the barrel at an angle. I could feel this happen as I slid the bolt forward, the same thing was happening with the Crosman bolt but not as bad.

My cure for this problem was to build a bolt with a hollow probe. The hollow probe pushes on the edge of the skirt, keeping the pellet straight as it is pushed into the barrel. The other bonus of this design is it doesn't matter how deep the skirt is, the pellet is always pushed past the transfer port.  

I saw a big improvement in groups, two ten shot groups and no fliers. It doesn't like CPHP....

Two 10 shot groups over the Chrony with 7.0 grain RWS Meisterkugeln pellets. 


While shooting over the Chrony this thing was showing its potential. 717 fps at 4 pumps! 5 pumps gives just under 800 fps and the valve starts retaining air. With some work I think 10 pumps would put out close to 1000 fps. I'm more than happy with 800 fps at 6 pumps so I'm not going to try for 1000 fps.

UPDATE:

I wanted to do some work to the pump linkage to see if I could make it better. During the testing the brass bushing at the muzzle end of the linkage started to fail, the split pin was chewing up the bushing. I made up a new bushing and turned up a new pin from drill rod. I was surprised at how much smoother the pumping was with the new pin. This got me to thinking, would replacing the bushings with bearings make it even smoother? A quick search online found bearings that would fit. (R166-ZZ) 3/16"X 3/8"X 1/8"

The muzzle end of the linkage is 1/4" thick so it will take two bearings, the piston end is 1/8" thick so it will get one bearing. There isn't enough metal to fit a bearing in the middle so it will stay a bushing.

The bushing is 1/4" OD so I will have to bore the linkage out to 3/8" for the bearing to fit. 

The bore wasn't as tight a fit as I wanted so I staked the edge of the hole with a center punch. 

I checked the pump force before changing to bearings, at 6 pumps it took 29 lbs to pump the rifle. With the bearings installed it took two lbs less force to pump it. While trying out the new mod I noticed a ping noise while pumping then the pump linkage started falling away from the pump tube after firing. A quick check and I found some play in the linkage at the piston end of the linkage. When I took the linkage apart the bearing came apart. 

Hoping the bearing was bad when I installed it I replaced the bearing with a fresh one and tried again, but got the same results. These bearings just aren't going to take the forces that the pump linkage generates. So it is back to brass bushings. I turned some new bushings to match the OD of the bearings. 

I'm happy with the way the linkage ended up.  

It's back in shooting form again and I have learned something new.
Thanks for following along.