Sunday, July 28, 2013

Crosman 766

I have had most of a Crosman 766 sitting on a shelf waiting to be put together for a year or more. At one point I had a list of the missing parts but never got around to ordering them. This weekend I dusted off the parts and put together another list. I need some other parts for another project that is on its way so I should actually get parts ordered this time.

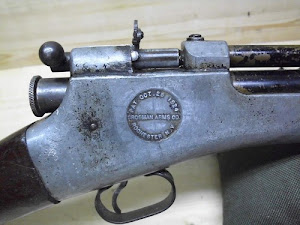
There are three variants of the 766, the first version had a tapered plastic barrel housing. The second variant had a tapered metal barrel housing and the third variant had a straight metal barrel housing. The third version was renamed and became the 2100 in 1983.
My rifle is the second variant of the 766. Parts are no longer available from Crosman as they quit making this version of the 766 in 1981. I am ordering parts from the parts list for a late model 2100. A lot of the parts for the 2100 have a 766 prefix, it was nice of Crosman to continue to use the same parts through the years otherwise it would be much more difficult to find the parts I need. There are some differences, most of which seem to be to make production easier and cheaper. I'm not saying the 766 is better than the 2100 just that the 2100 is less expensive to make and the reason you can get a 600+ fps pumper that will put pellets inside a dime at 10 yards for around $60.

There were enough parts to bolt together to make sure it was shootable and it has turned out to be a good shooter so far.


I shot this group at 10 yards, from a bench rest with iron sights. Close to dime sized... not bad.

The missing parts are for the BBs, and the detent that holds the pump arm in the closed position. Being able to shoot BBs isn't important to me but it might be to the next owner so I want to replace them. I replaced the pump seal with a new one and for now the pump arm stays in the closed position.

I cleaned up the valve first, I got lucky and everything looked good and works well. I replaced the O-rings while it was apart.

I used a wooden dowel to push the valve into the pump tube making sure the exhaust port on the valve was lined up with the corresponding hole in the pump tube. The pump got a new pump cup.

I slid the pump into the tube and pressed the pivot pin in place. 

Here are the breech, bolt and BB magazine.

The parts assembled and installed in the receiver half, one of the few differences from the 2100 is the screw that holds the breech in place.

The hammer, hammer spring and plug. 

Getting all of those pieces  assembled and into the receiver half is the most challenging part of this reassembly. It can be very frustrating and take a few tries but it will all fit together, a certain amount of colorful language is required. If you don't cuss, you may start after trying to put one of these back together.

Another difference from the 2100 is the sear, however the trigger is the same for both the 2100 and 766. 


Once I get the missing parts I will tear the 766 apart again for a final clean up and reassembly. It is in pretty good shape for a 30 year old air gun.... actually it is in damn good shape for its age. 


Monday, July 22, 2013

Daisy 25

I had a Cabelas Fathers Day gift card I needed to spend so I picked up a Daisy Model 25 last weekend. I'm not a huge fan of BB guns but there are now two BB guns in my collection. The Model 25 joins its cousin the Red Ryder. My 70th anniversary Red Ryder is used as a Christmas decoration and leans against an old console radio that has a leg lamp sitting on it..... My tribute to "A Christmas Story".


The Model 25 is a well made BB gun. Daisy did a good job with this one. They made like it should be made, with wood and metal. 


Fit and finish is pretty good, the wood and the painted metal look good. The classic hunting scene is engraved into the metal.


To load the rifle the shot tube is unscrewed and up to 50 BBs can be loaded into the magazine.

The rear sight has the option of a notch or peep, I prefer the peep as my eyes aren't what they were when I was 10 years old and the peep makes it easier for me to see the target.


 I shot a few 10 shot groups at 5 yards from a bench with the rifle rested on a bag. This was my best group at 1 inch with most of the shots going into a group of about a half an inch. More than accurate enough to kill  pesky soda cans.

This BB gun wont get shot much, it will keep the Red Ryder company hanging on the wall. I think it would make a great first BB gun for a kid, it is built solid enough to survive a young shooter.  


Saturday, July 20, 2013

The Treadle Motor assembled

I managed to get all the bits and pieces assembled for a test run. Here is a short video of the initial test run. 
It made me feel a bit uncoordinated...


I also made up a base to mount it on. Now it is time to disassemble it for final fit and finish.  


UPDATE: 
I cleaned everything up, rounded off the square corners and reassembled the motor.


I'm happy enough with the way it looks but it needs a heavier flywheel to smooth out the way it runs. 
The 3 inch aluminum flywheel just doesn't have enough inertia to make it run smoothly.
I may just start over and build a second motor using steel instead of aluminum as a flywheel. 

Tuesday, July 9, 2013

Treadle/Finger Motor

While I wait to find my next air gun project I thought I would do something a bit different. My air gun addiction lead me to purchase an old Craftsman lathe. I figured out early on that if I was going to modify/tune my air guns I was going to need some tools.

 The lathe was made in the mid 1930s, I was lucky enough to purchase it from the son of the original owner.


 While a lathe is great for making round parts it is much more difficult to make square parts with one, not to mention putting slots and holes in the proper place. These kinds of operations are best done with a milling machine. Luckily there are reasonably priced mills available for hobbyists like me. I waited for Harbor Freight to put it on sale and was able to use a coupon to take a few more dollars off, then  I made the purchase.....

Lucky for me there are plenty of forums, blogs and U tube videos out there to to help me learn the proper way to use these tools.


One of the first projects I built was an oscillating air motor. The video below is of the second one I built. Turn down the sound before you start the video, it is LOUD.
These engines are great for beginners to build as they are simple motors and don't require any close fits or tight tolerances. It is surprising how much fun it is to fire one of these up for the first time. 

I decided to build the finger powered motor for a couple reasons. They are simple and the only power required is provided by tapping your finger. Eventually I will build an IC "internal combustion" engine but for now simple projects like this satisfy my need to build/ create something from bits of metal.

I started with the fly wheel. The largest round stock I have is 3" OD but it had a threaded hole in the center. So I bored that hole to 3/4" and made a press fit hub to fill up that hole.


Then I mounted the flywheel in the lathe to add some shape to it. After the initial assembly I plan on disassembling it and adding some cosmetic touches.

I put the hub in the freezer for a couple hours to shrink it a few thousands then pressed it into the fly wheel. 

Next up was the upright that the crank shaft is mounted to.


I made a mistake on my first attempt at making the lever but was able to use that mistake to build the connecting rod.

Adding some shape to the lever. 

The finished lever.

The mistake turned into a connecting rod


Here are the bits and pieces so far. I still need to make a crank shaft, some bushings and a base but it is coming along quickly. I also need to make a trip to the hardware store to pick up some fasteners

Work is interfering with my shop time but I'll be back as soon as possible to finish this up. I need to get this done before the next air gun shows up, which should be another pistol..... Right Joel?