
Disassembly was easy, I had done some research online to get familiar with the internals before I opened it up.


To remove the pump assembly remove the screw and square washer from the pivot.


The pump assembly can now be slid out the front of the pump tube.


I didn't find any debris or dirt in the valve that would cause the leak. I looked at the valve and seat with a 10X loupe. The valve looked good but the seat looked a little rough. Here is a pic through the loupe. I could see a few small voids that I suspect were causing the leak.

To clean up the seat I used a 1/4" carbide burr. I turned the burr with my fingers and only let the weight of the burr do the cutting. I turned it a few times then checked the seat with the loupe, I repeated this until I had a nice clean seat. Then cleaned the chips out with a Q-tip. I reassembled the valve putting a light coat of oil on the valve and the O-ring that seals the valve to the body.

A few things to pay attention to on reassembly, there are notches in the pivot sleeve that have to be aligned with tabs on the bottom of the front sight.


With the pump reassembled and the front sight attached slide the barrel and pump assembly back in place.

When installing the grip frame make sure the lever that opens the exhaust valve is in the correct position.

Also make sure the trigger interlock is in front of the shoulder on the bolt. This lever keeps the gun from being fired with the bolt open.

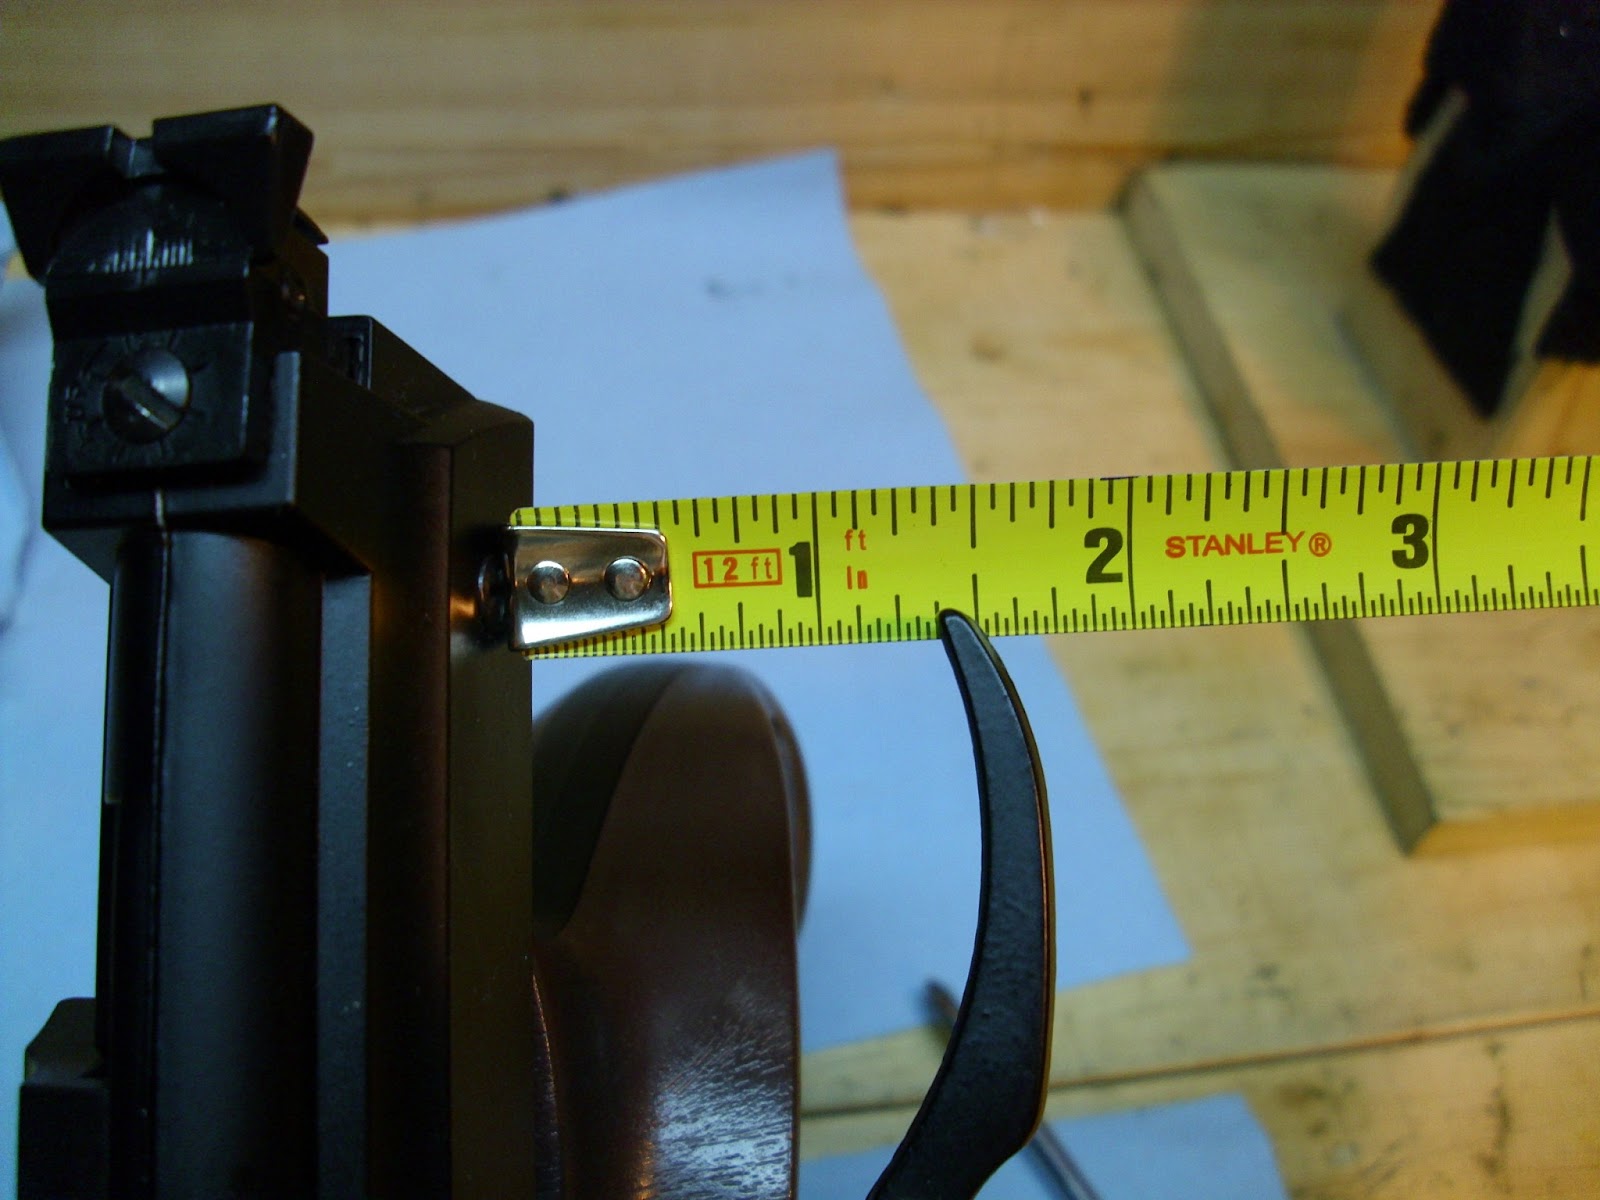
With everything reassembled the head space for the piston needs to be rechecked. With the gun fired and the bolt closed adjust the length of the piston until you can feel the piston touch the face of the exhaust valve with the end of the lever 1 1/8" to 1 1/2" from the closed position.
Everything is reassembled and leak free.

Thank you for the very detailed break down and repair. I'll perform the same actions on my own 747.
ReplyDeleteYou're welcome! Thanks for taking the time to read my blog.
ReplyDelete